# Advanced Techniques
The Tutorial provides enough information to create an interesting video, but there is still more to learn.
This page contains a description of the advanced techniques I used to create the LUVORATORRRRRY! video.
WARNING
For first-time users, I recommend following and understanding The Tutorial completely before attemping to use any of the advanced techniques.
# Target Rotation: Intro
Before reading, please review Moving the Target.
The camera follows the target position and rotation.
The template.blend file included with the blender2camera2 download package has a Target object that is configured so that the camera is always upright. The player head is always pointed toward the top of the view.
An upright camera is okay to use for most scenes. If you want to add more variety to your scenes then you can try rotating the target, which will also rotate the camera.
Here is an example of camera rotation in action:
Camera rotation does not need to be dynamic. The target rotation can be locked so that the camera is always tilted at the same angle. This can create more dramatic, cinematic shots.
# Target Rotation: Static
# Step 1: Set rotation keyframes
Static rotation is simple, just set the same rotation value on the start and end keyframes.
# Step 2: Reset rotation for the next scene
If you do not want to use the same rotation value for the entire video, do not forget to set the camera rotation angle back to 0.000 on the first frame of the next scene.
# Target Rotation: Dynamic
# Step 1: Set rotation keyframes
Dynamic rotation works just like static rotation, but the start and end values are different.
The target will use these values just like the X / Y / Z position values and rotate automatically.
# Step 2: Reset rotation for the next scene
As with static rotation, remember to reset the rotation for the next scene. If you do not want to use the same rotation value for the entire video, do not forget to set the camera rotation back to zero on the first frame of the next scene.
# Step 3: Adjust animation curves
- Simple rotation should use a linear transition for best appearance.
- You are free to use Bezier animation curves if you wish.
# Bump / Kick Rotation
If you want to do what I did in the LUVORATORRRRRY! video near 1:35, try using these Bezier curves on the target rotation.
Position your Bezier handles like this:
# Fast Swoop Movement
Before reading, please review Create a Complex Camera Path.
"Fast swoops" allow a camera to move quickly to a new angle, but without confusing the viewer about where the camera came from, or went to.
They can also briefly trick the viewer into thinking that the game is running in slow motion, when it is not.
Here is an example from the LUVORATORRRRRY! video:
# The Basic Movement Pattern
The create a fast, smooth movement, follow this pattern:
- Move slowly over a short distance
- Move quickly over a long distance
- Move slowly over a short distance
The videos below show an example of how this is down in the example.blend file. You can use the file you created in the tutorial, or use the example.blend file that was included in the blender2camera2 download package.
# Step 1: Move slowly over a short distance (first part)
In the tutorial example, on Path002-complex, the camera moved from offset -6.200 to -89.400. This can be split up into 3 parts.
- Use the Layout workspace and the keyframe editor.
- Under the camera Object Constraint, adjust the Offset field.
- Create a new keyframe for this short distance at the beginning of the path.
# Step 2: Move quickly over a long distance
- Adjust the camera Offset field, just like in Step 1.
- To make the camera move quickly over a long distance, decrease the amount of time that the camera has to move.
TIP
Remember that the keyframes should be close together.
# Step 3: Move slowly over a short distance (last part)
This is same as Step 1, but for the last part of the path.
# Step 4: Adjust animation curves
- If your camera path was using Bezier curves, then it might look weird after adding fast swoops.
- Use the Animation workspace to adjust the camera Offset animation curves.
# A Real Example
Here are some of the "fast swoop" animation curves in the LUVORATORRRRRY! video. Remember you can see these for yourself in the release.blend file.
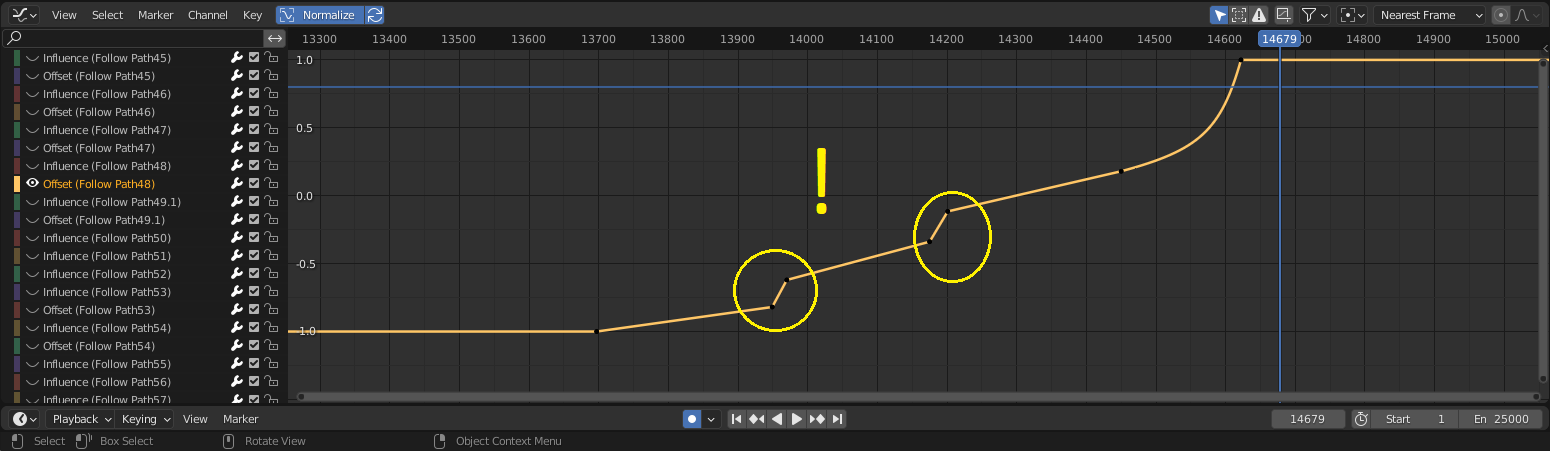
# Dynamic Field of View
Camera2 movement scripts support location, rotation, and field of view (FOV).
You can adjust the FOV so that a scene appears closer to the camera, without changing the location of the camera.
Blender natively supports changing the camera FOV. The blender2camera2 script will translate the FOV values automatically.
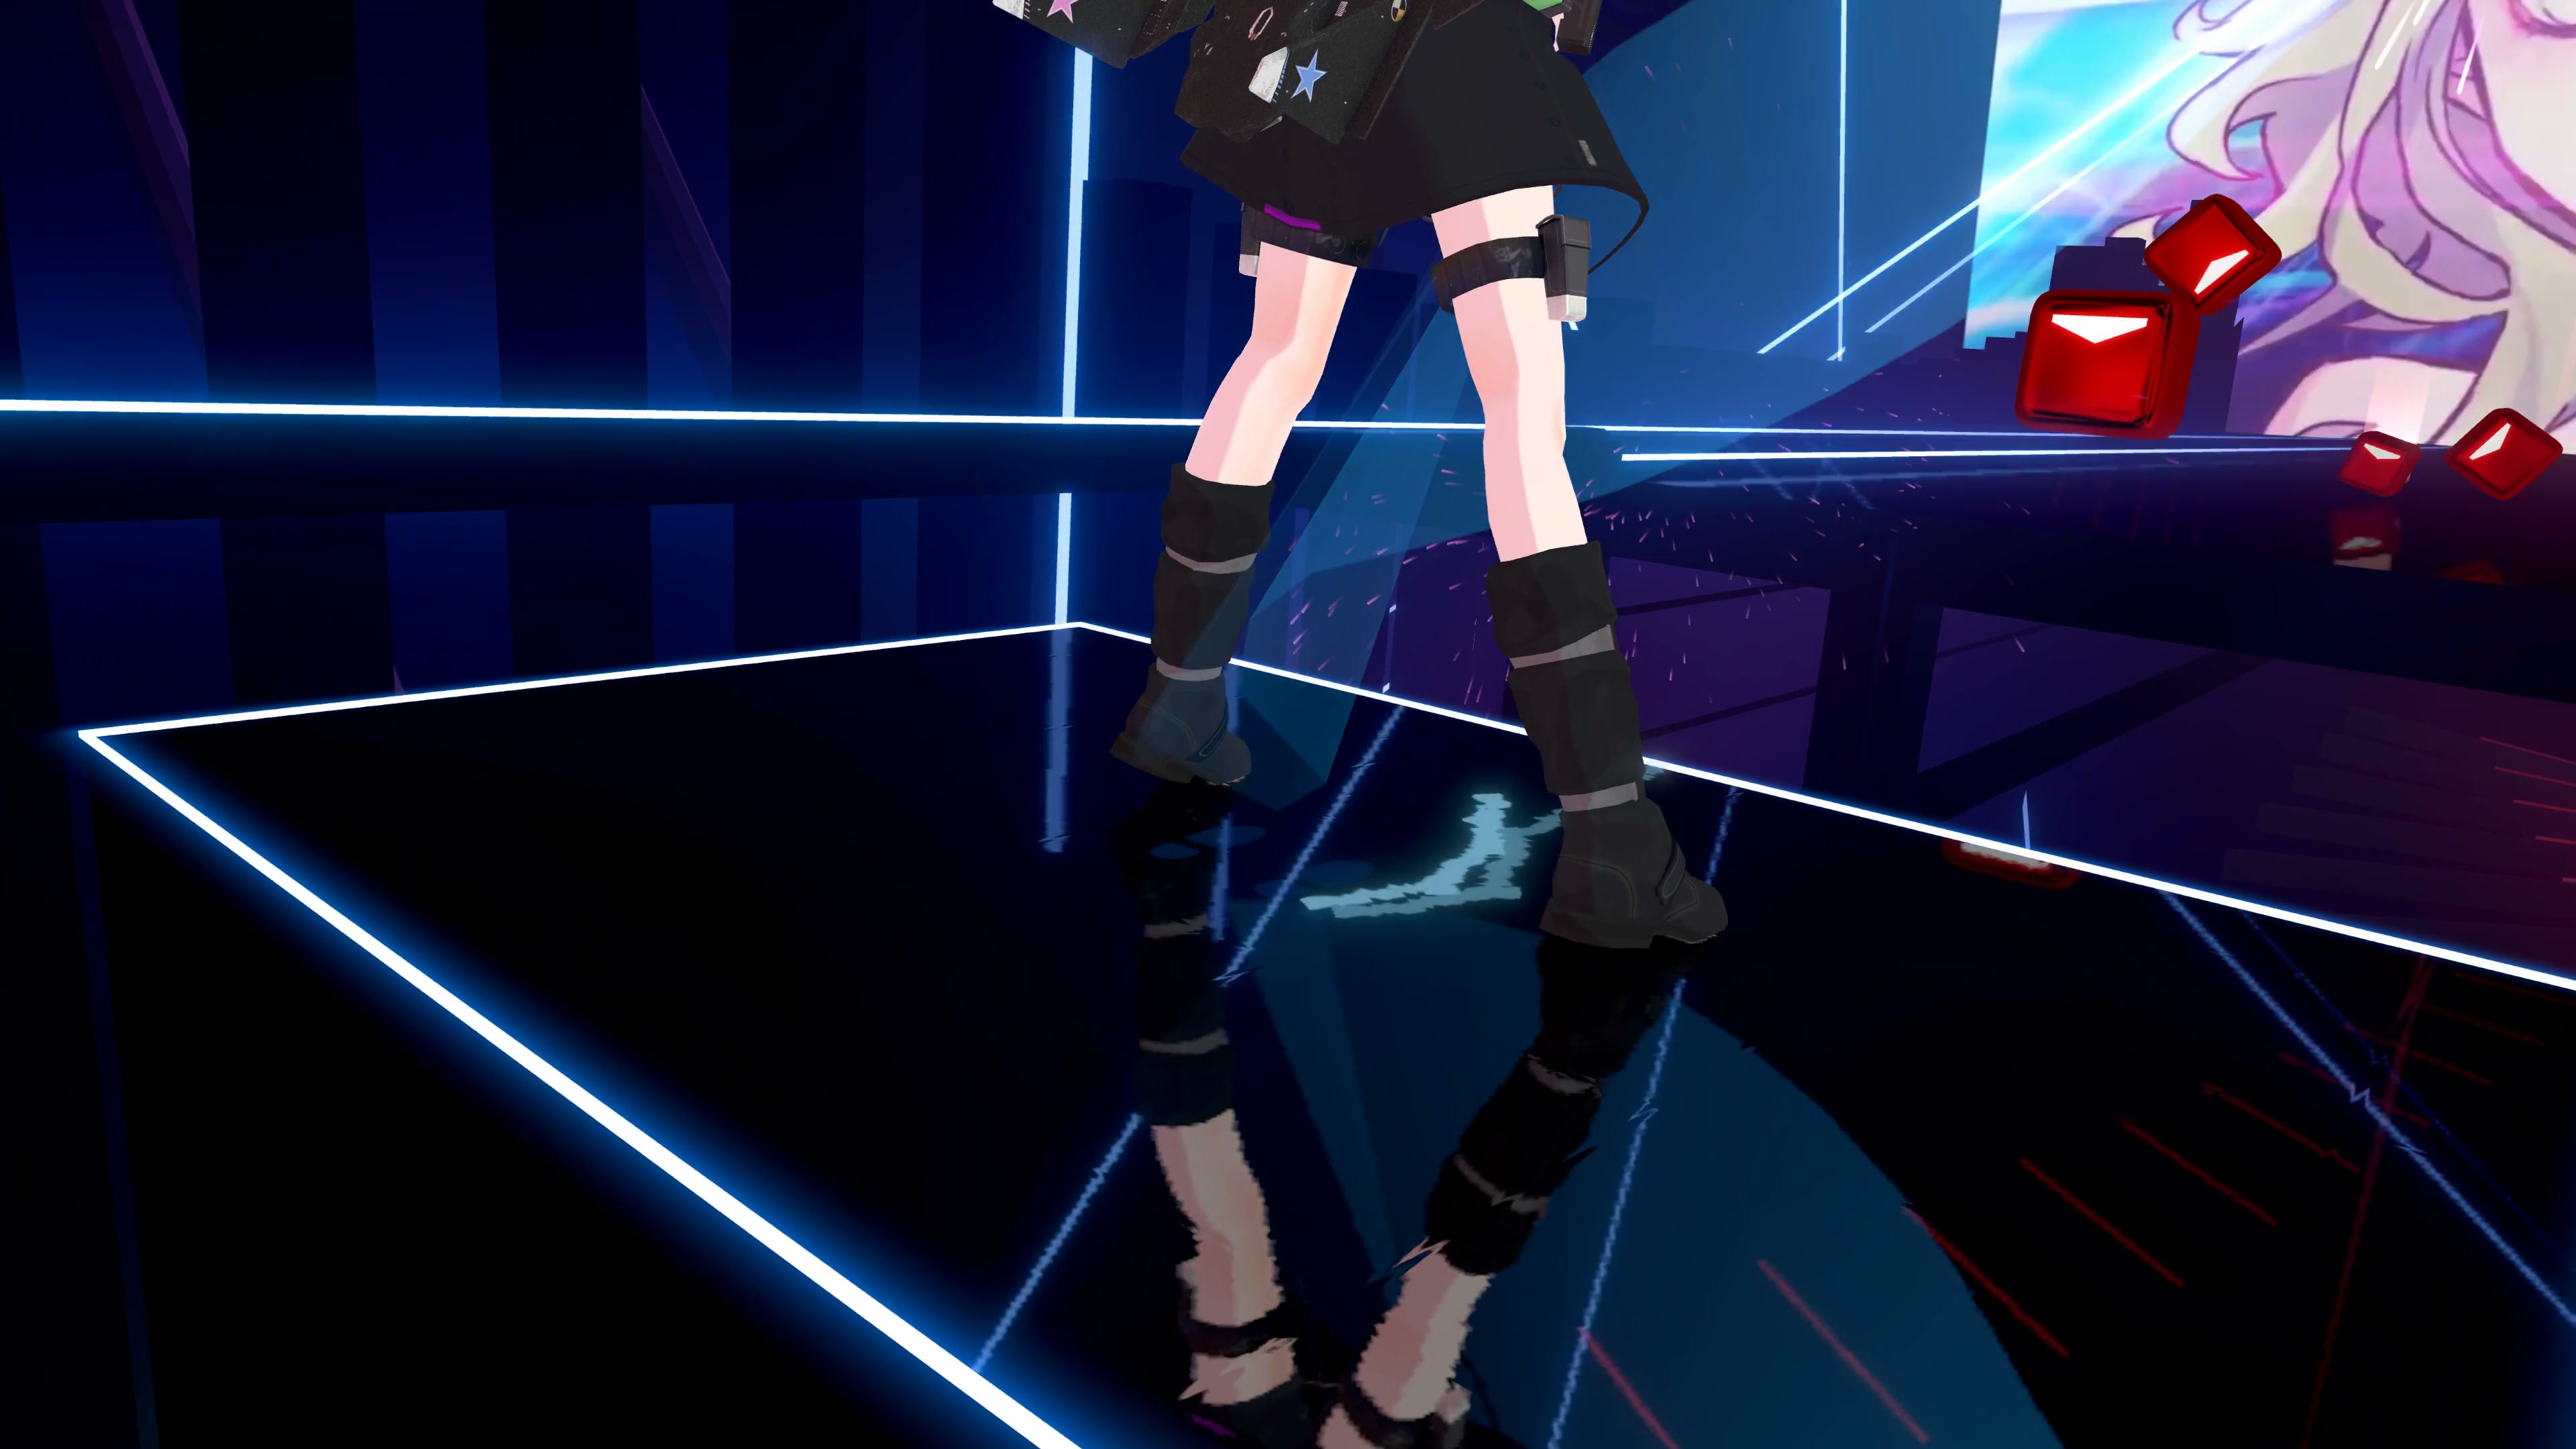
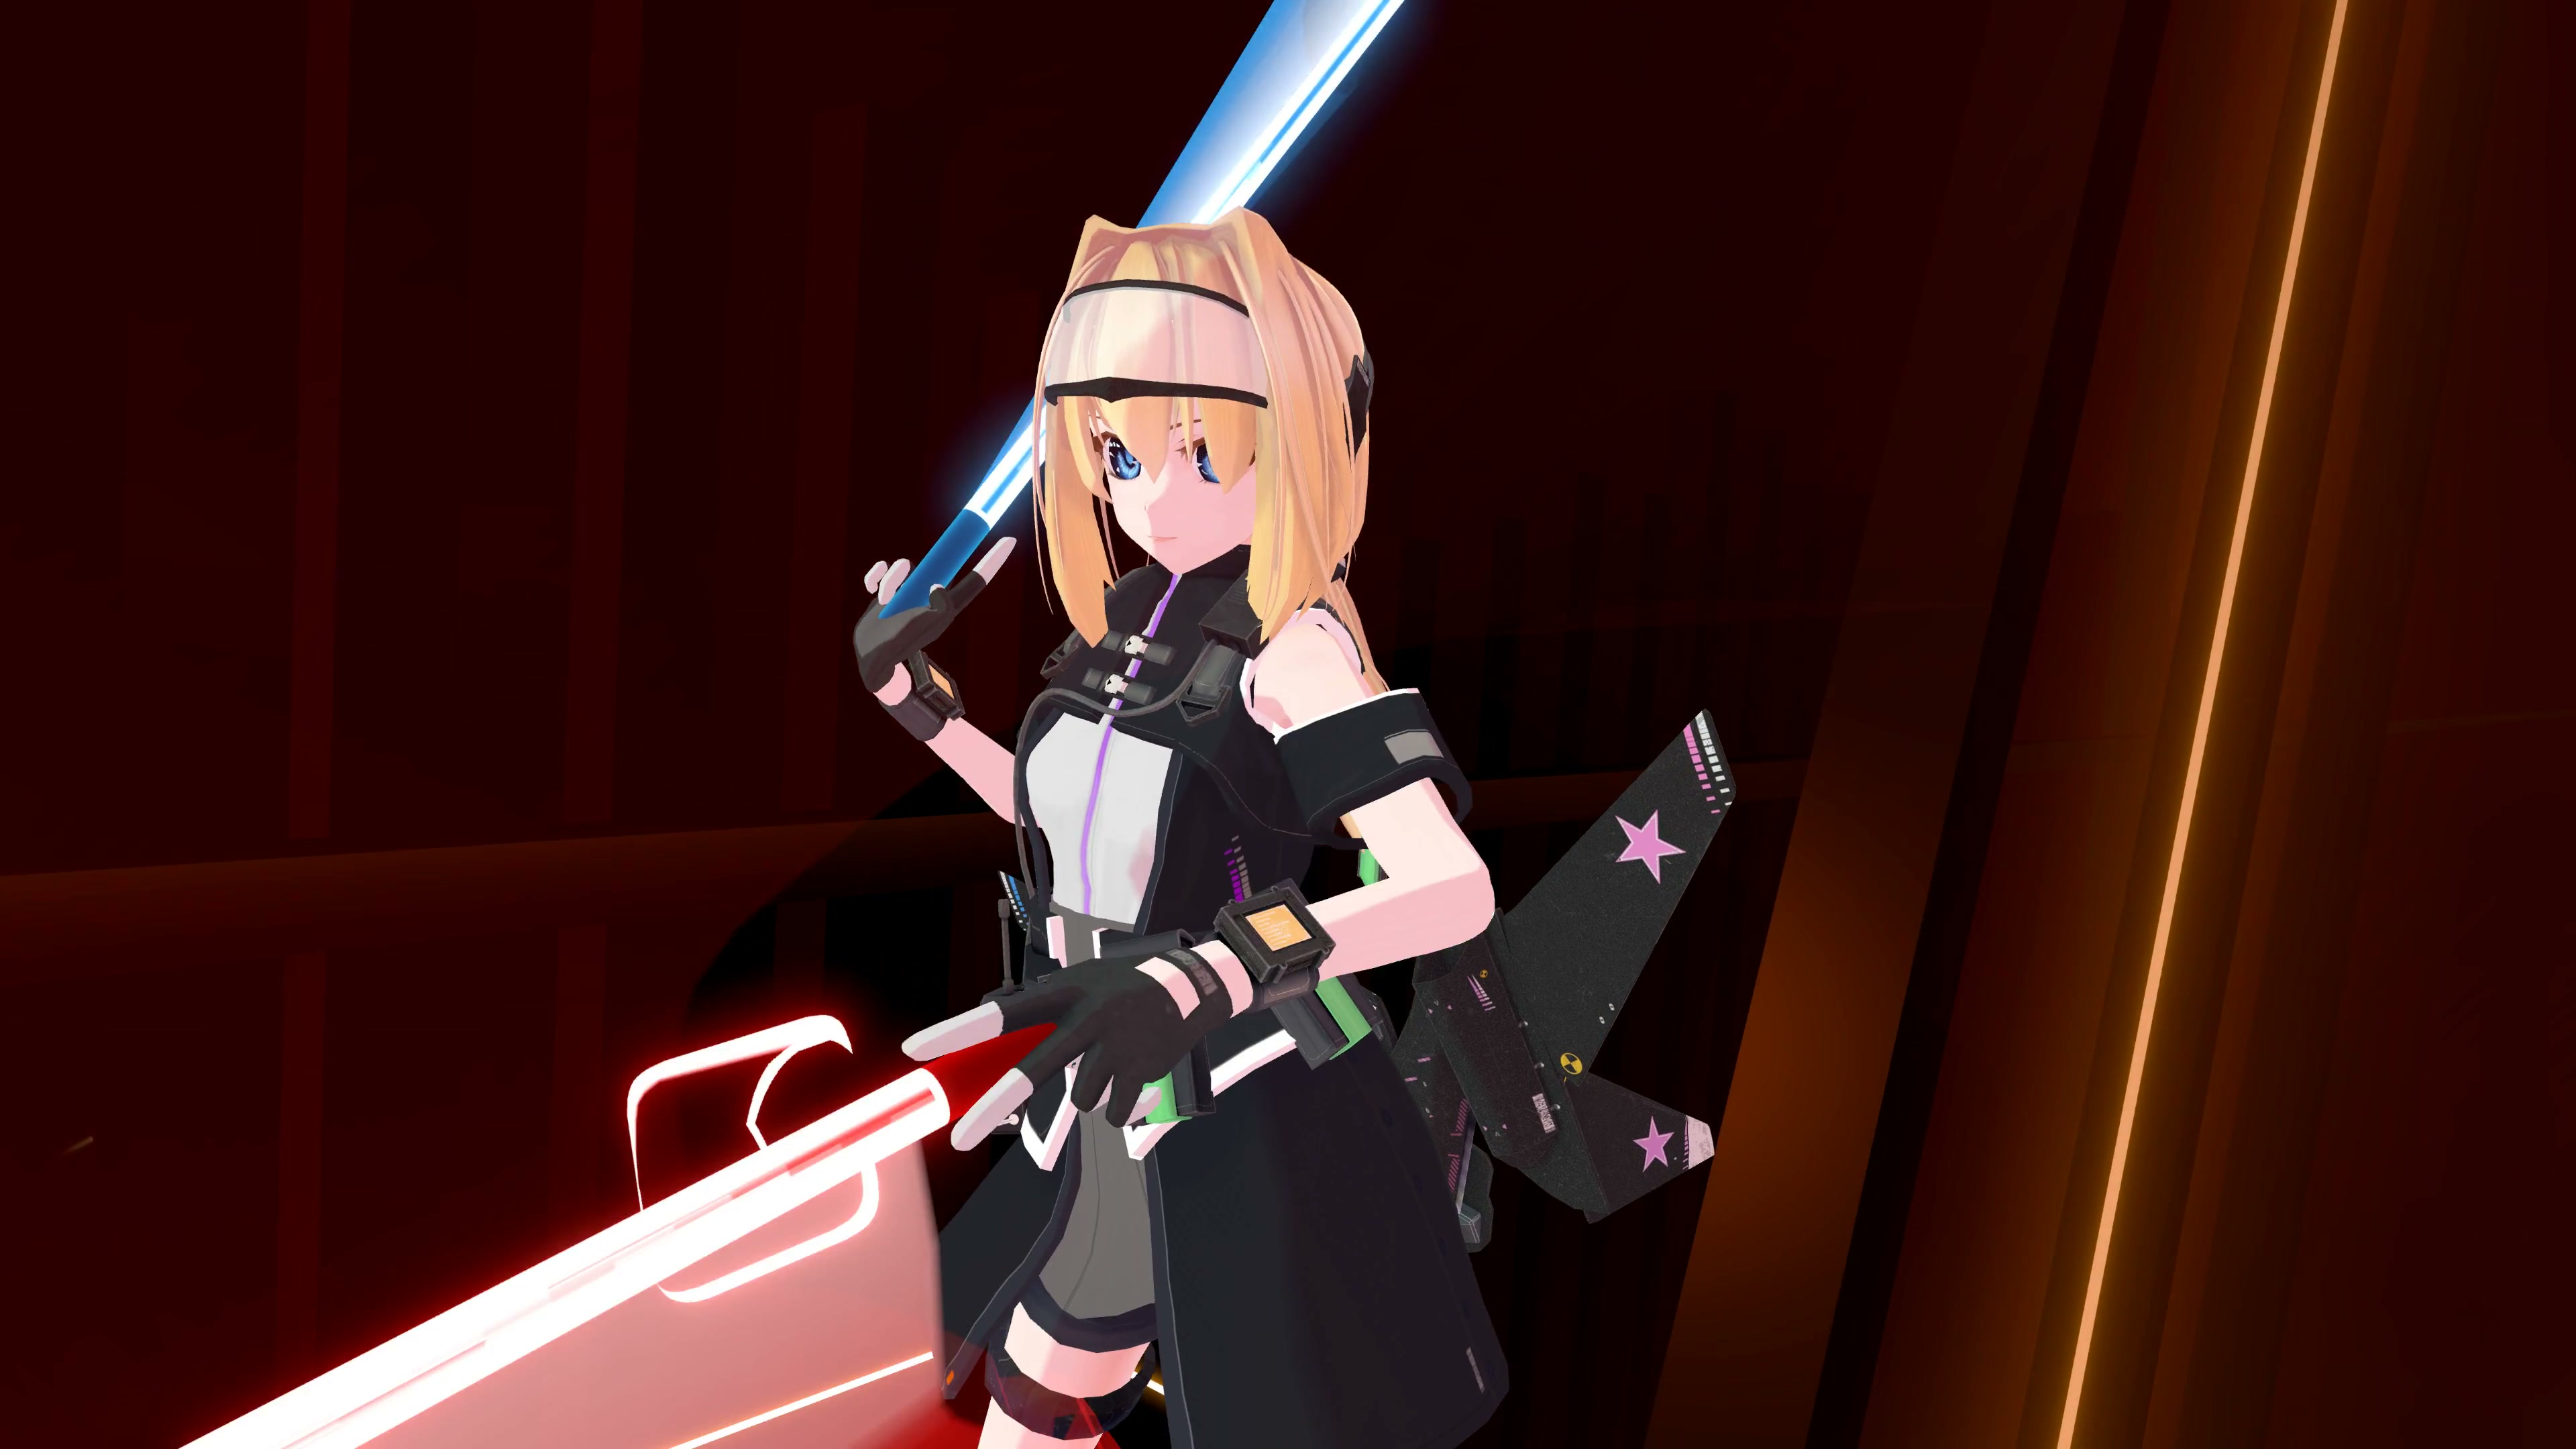
Here are some screenshots from the LUVORATORRRRRY! video that show how a shallow FOV can provide a more intimate scene:
# Summary
- Lock the FOV on the keyframe that exists just before the scene starts. This should be the last keyframe of the previous scene.
- Set the FOV on the first keyframe.
- Set the FOV on the last keyframe.
- Reset the FOV on the next scene, if necessary.
# Step 1: Lock the FOV on the previous scene
WARNING
If you do not lock the FOV before the scene starts, the the FOV will be affected in every previous scene.
- Under Scene Collection, in the Render collection, select the
b2c2_maincamera. - Left-click the Object Data Properties tab (it looks like a movie camera).
- Find the Focal Length field and click Animate property. The field should turn yellow, to indicate that is now part of the keyframe.
# Step 2: Set the FOV on the first keyframe
- Move the current frame to the first keyframe of the scene.
- Set the new FOV value.
- Verify that the FOV is set on the keyframe - the Focal Length field should turn yellow.
# Step 3: Set the FOV on the last keyframe
This is the same as Step 2, but with the last keyframe of the scene.
# Step 4: Reset the FOV on the next scene
Like with Step 1, if you do not reset the FOV for the next scene, all later scenes will be affected.
# Bonus: Animation Curves
FOV transitions can be adjusted using animation curves.
# Another Example
In the LUVORATORRRRRY! video I did not rely on FOV changes very often. Here is a pattern I used for the close-up camera near 2:05.
# Spring / Bounce Camera Movement
Before reading, please review Create a Simple Camera Path.
Camera transition movement can be adjusted using animation curves. These curves can be as simple or as complex as you want.
One thing you can do is make the camera bounce at the start and end of a movement, as though the camera is attached to a spring. This makes the camera movement look more dramatic and more natural. This is a very easy thing to do.
Here is an example from the LUVORATORRRRRY! video:
Here is the effect in slow motion:
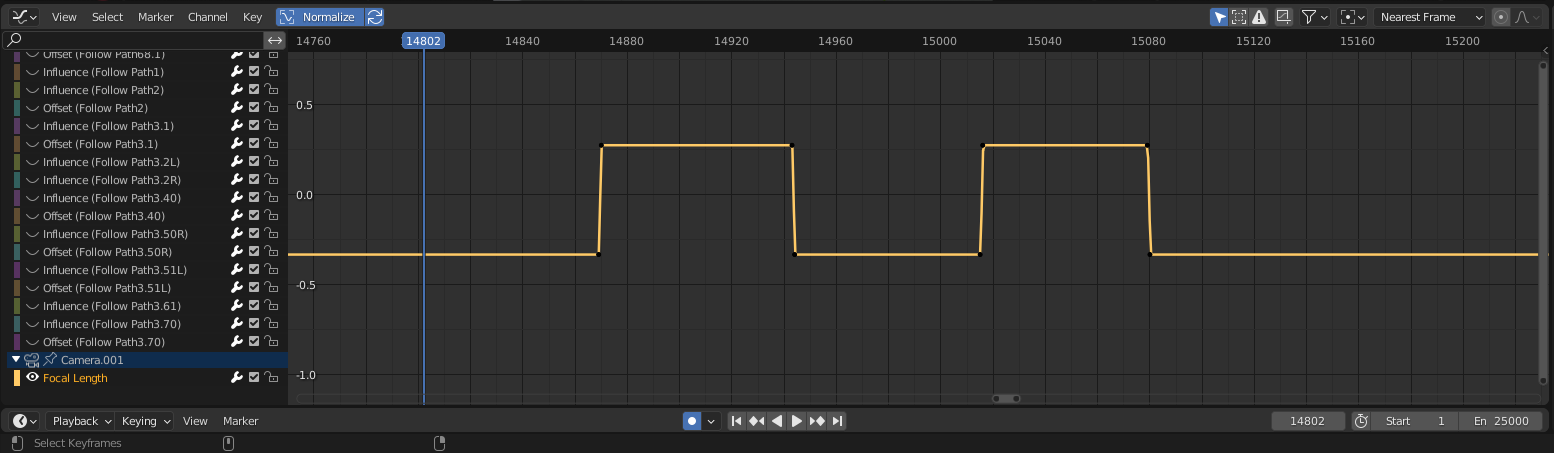
# Step 1: Prepare the animation curve
- Open the Animation workspace.
- Find the portion of the timeline that you want to edit.
- Find the start of the camera Offset animation curve.
- Set the curve Interpolation Mode to Bezier.
# Step 2: Add overshoot to the beginning of the animation curve
This will make the camera move backwards slightly, before moving forward toward the end of the curve.
# Step 3: Add overshoot the end of the animation curve
Same as Step 2, but at the end of the curve.
That is all you need to do. Happy streaming!
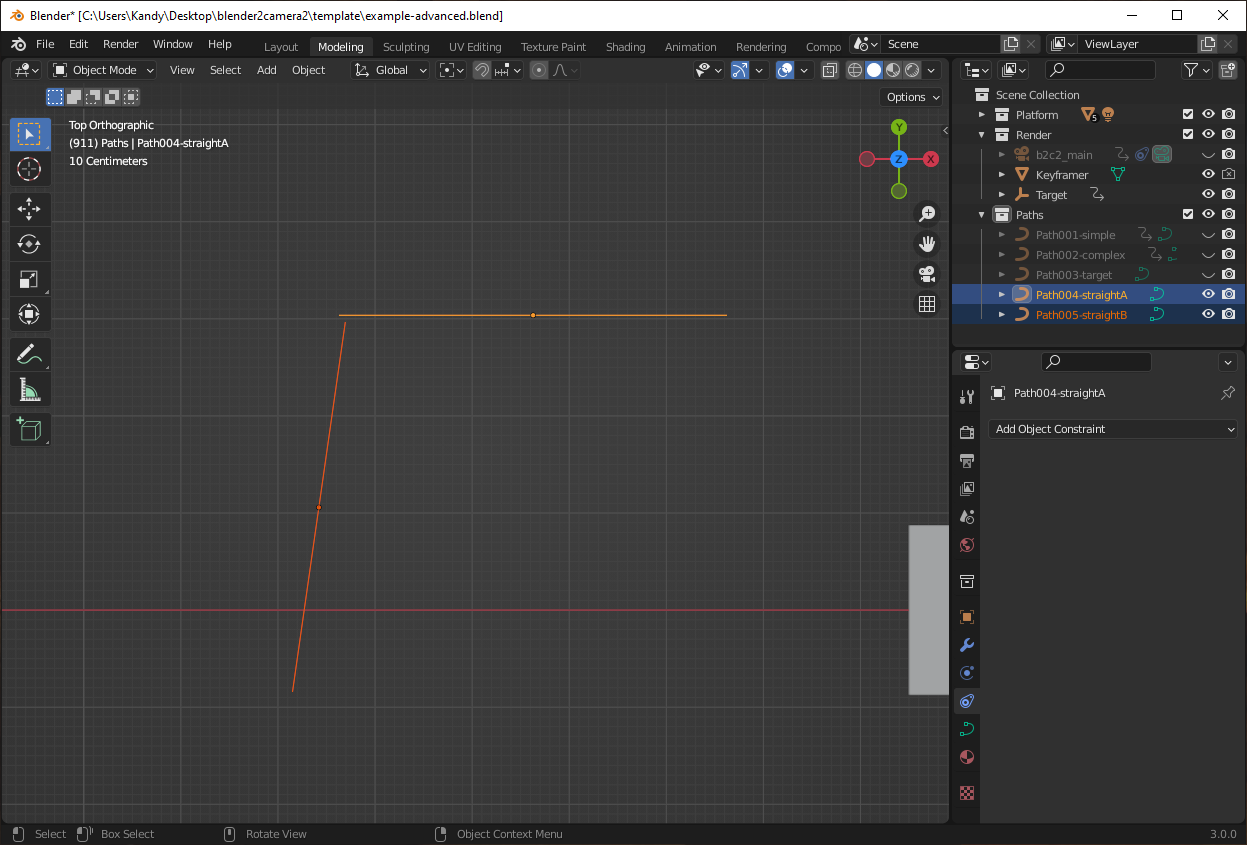
# Sharp Angle Movement
Before reading, please review Create a Simple Camera Path.
Sometimes you want to move the camera along a straight path, and then immediately move in another direction, also on a straight path.
Like this:
If you try to connect two (or more) paths together by hand, you will end up with a gap between the paths. The video below shows an example with a very large gap.
If you try to animate a camera along these two paths, then you will see a jump. This looks bad.
# Summary of Steps
- Create the first and second paths
- Use the 3D cursor to change the pivot point of the second path
- Set the 3D cursor at the end of the first path
- Snap the second path to the end of the first path
# Step 1: Create the first and second paths
- I assume that you already know how to do this. If not, refer to the tutorial.
- The picture below shows two paths that are not quite connected.
# Step 2: Set the 3D cursor to the beginning of the second path
- Select the second path.
- Press Tab to enter Edit Mode.
- Select the point where the first path will transition to the second.
- Press Shift + S.
- Left-click Cursor to Selected.
# Step 3: Set the pivot point on the second path
- Press Tab to enter Object Mode.
- Select the second path.
- Right-click on the second path.
- Select Set Origin → Origin to 3D Cursor
# Step 4: Set the 3D cursor to the end of the first path
- Select the first path.
- Press Tab to enter Edit Mode.
- Select the point where the first path will transition to the second.
- Press Shift + S.
- Left-click Cursor to Selected.
# Step 5: Snap the paths together
- Press Tab to enter Object Mode.
- Select the second path.
- Press Shift + S.
- Left-click Selected to Cursor.
The paths will snap together perfectly.
Now you can see that the camera movement between the two paths has no jumping or glitching.
After this you can edit the animation curves like normal.
# Spiral Curves: Intro
Most of the curves in the LUVORATORRRRRY! video were drawn "by hand" by creating a Path and then adjusting the Bezier handles.
There is one scene where I used a spiral curve, so I could focus on where the camera was looking, instead of how it was moving:
This scene uses an Archemedian Spiral Curve. It looks like this:
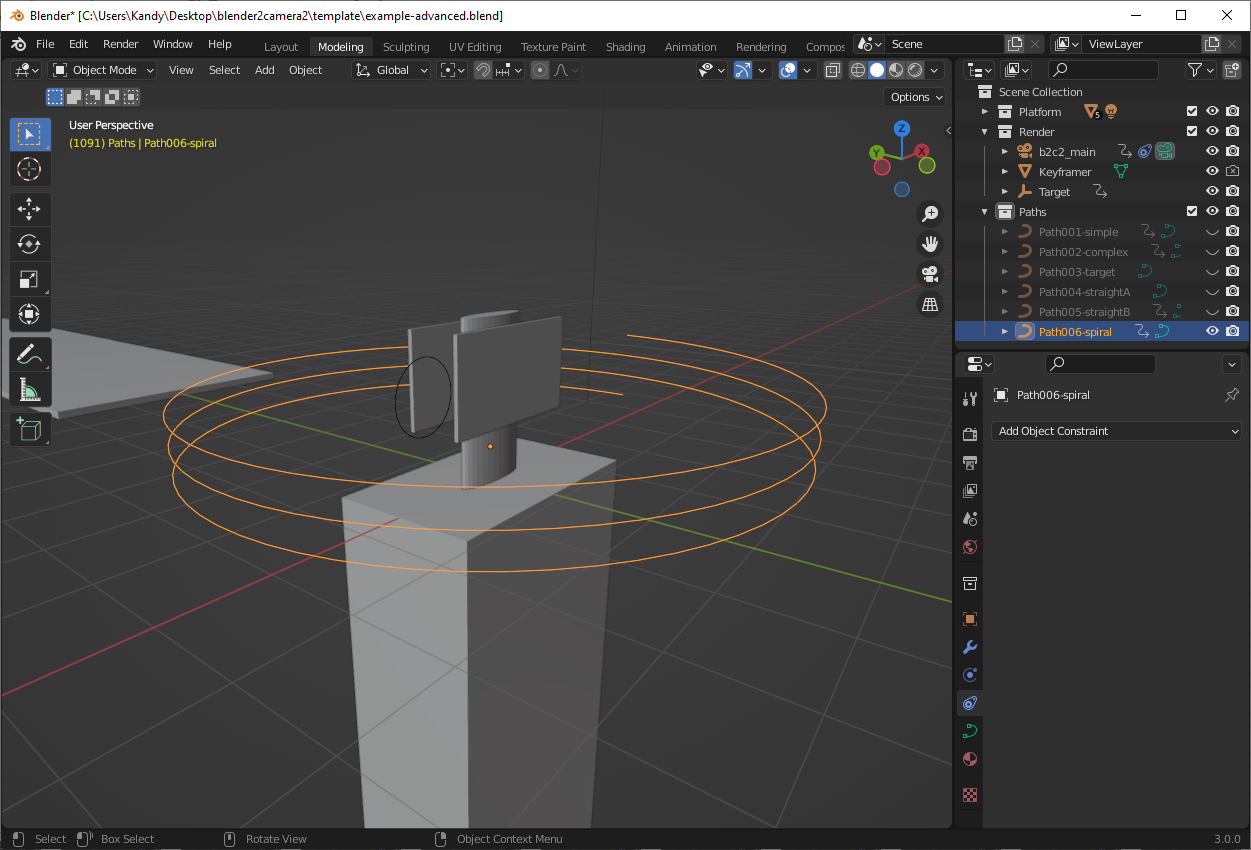
You can easily create these spirals in Blender. But first, you must enabled a Blender add-on to make it possible.
# Spiral Curves: Enable Add-on
# Step 1: Open Blender preferences
- At the very top of the Blender window, click on the Edit menu.
- At the bottom of the menu, click on Preferences...
# Step 2: Open the "Add-ons" menu and enable "Add Curve: Extra Objects".
- Click the Add-ons tab.
- In the upper right corner, in the search field, type
extra. - Find Add Curve: Extra Objects and check the box.
- Close the Preferences window.
# Step 3: Verify that the extra curve options are available.
- Switch to the Layout or Modeling workspace.
- Verify that the workspace is in Object Mode.
- Shift + A.
The pop-menu should now contain many more curve and spiral options.
# Spiral Curves: Creating a Spiral
# Step 1: Add a spiral to the scene
- Verify the workspace is in Object Mode.
- Set the 3D cursor to the origin by pressing Shift + S, and selecting Cursor to World Origin.
- Press Shift + A.
- Select Curve → Curve Spirals → Archemedian.
The default spiral will appear at the 3D cursor.
WARNING
Do not click on anything yet!
# Step 2: Edit the spiral options
- In the pop-up that appears, adjust the parameters to change the shape of the spiral.
- After creating the spiral, you can attach a camera constraint and animate it like normal.
# Example: Camera Movement on a Spiral
Here is what the camera looks like when attached to the spiral:
# Other Notes
- When creating the spiral, set the number of Steps to
64or higher. This will make the camera movement smooth. A lower number will make the camera movement look strange. - The spiral curve can be modified in Edit Mode, just like any other path object.
# Animation Curve Transitions
If you want to make your camera movements more interesting, you will need to use animation curve transitions.
All of the animation curves in the LUVORATORRRRRY! video use either Linear or Bezier transitions. I prefer using Bezier where possible, but maybe you want something that is easier to configure.
In the Blender animation editor these transitions are called Interpolation Modes.
# Changing Interpolation Modes
- Right-click on an animation curve keypoint.
- Select Interpolation Mode.
- Choose the option you want.
# Render a Preview with Blender and Avidemux
WARNING
This process requires a lot of disk space and render time.
Before reading, please review Exporting Camera Paths from Blender. Be sure to set the End (Final) frame before starting the render.
Blender can become unstable and crash if you try to play more than a few seconds of camera movements.
I wanted a way to preview camera movement through the entire song, without loading the path into Beat Saber. It does not look anything like the real game, but is close enough to help you understand how your camera movements fit together.
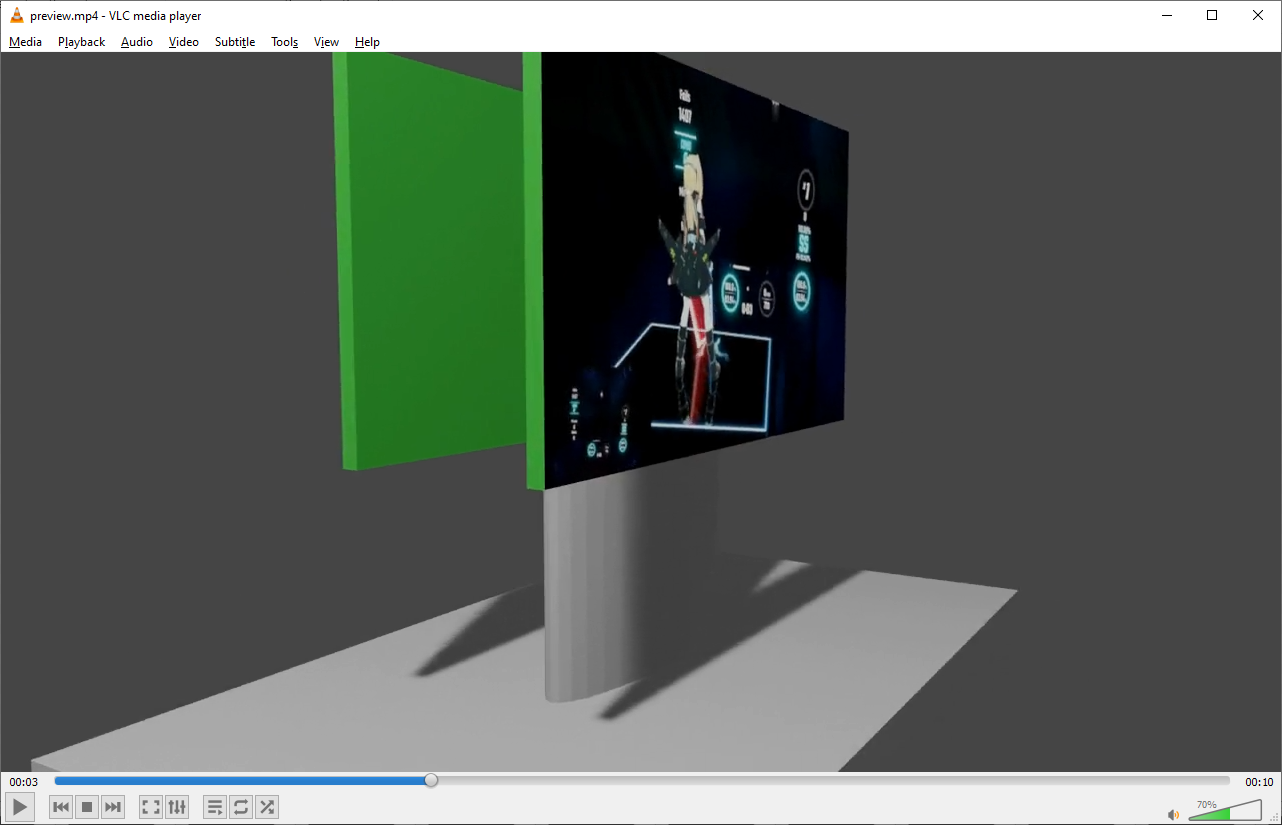
Here is what a rendered preview looks like:
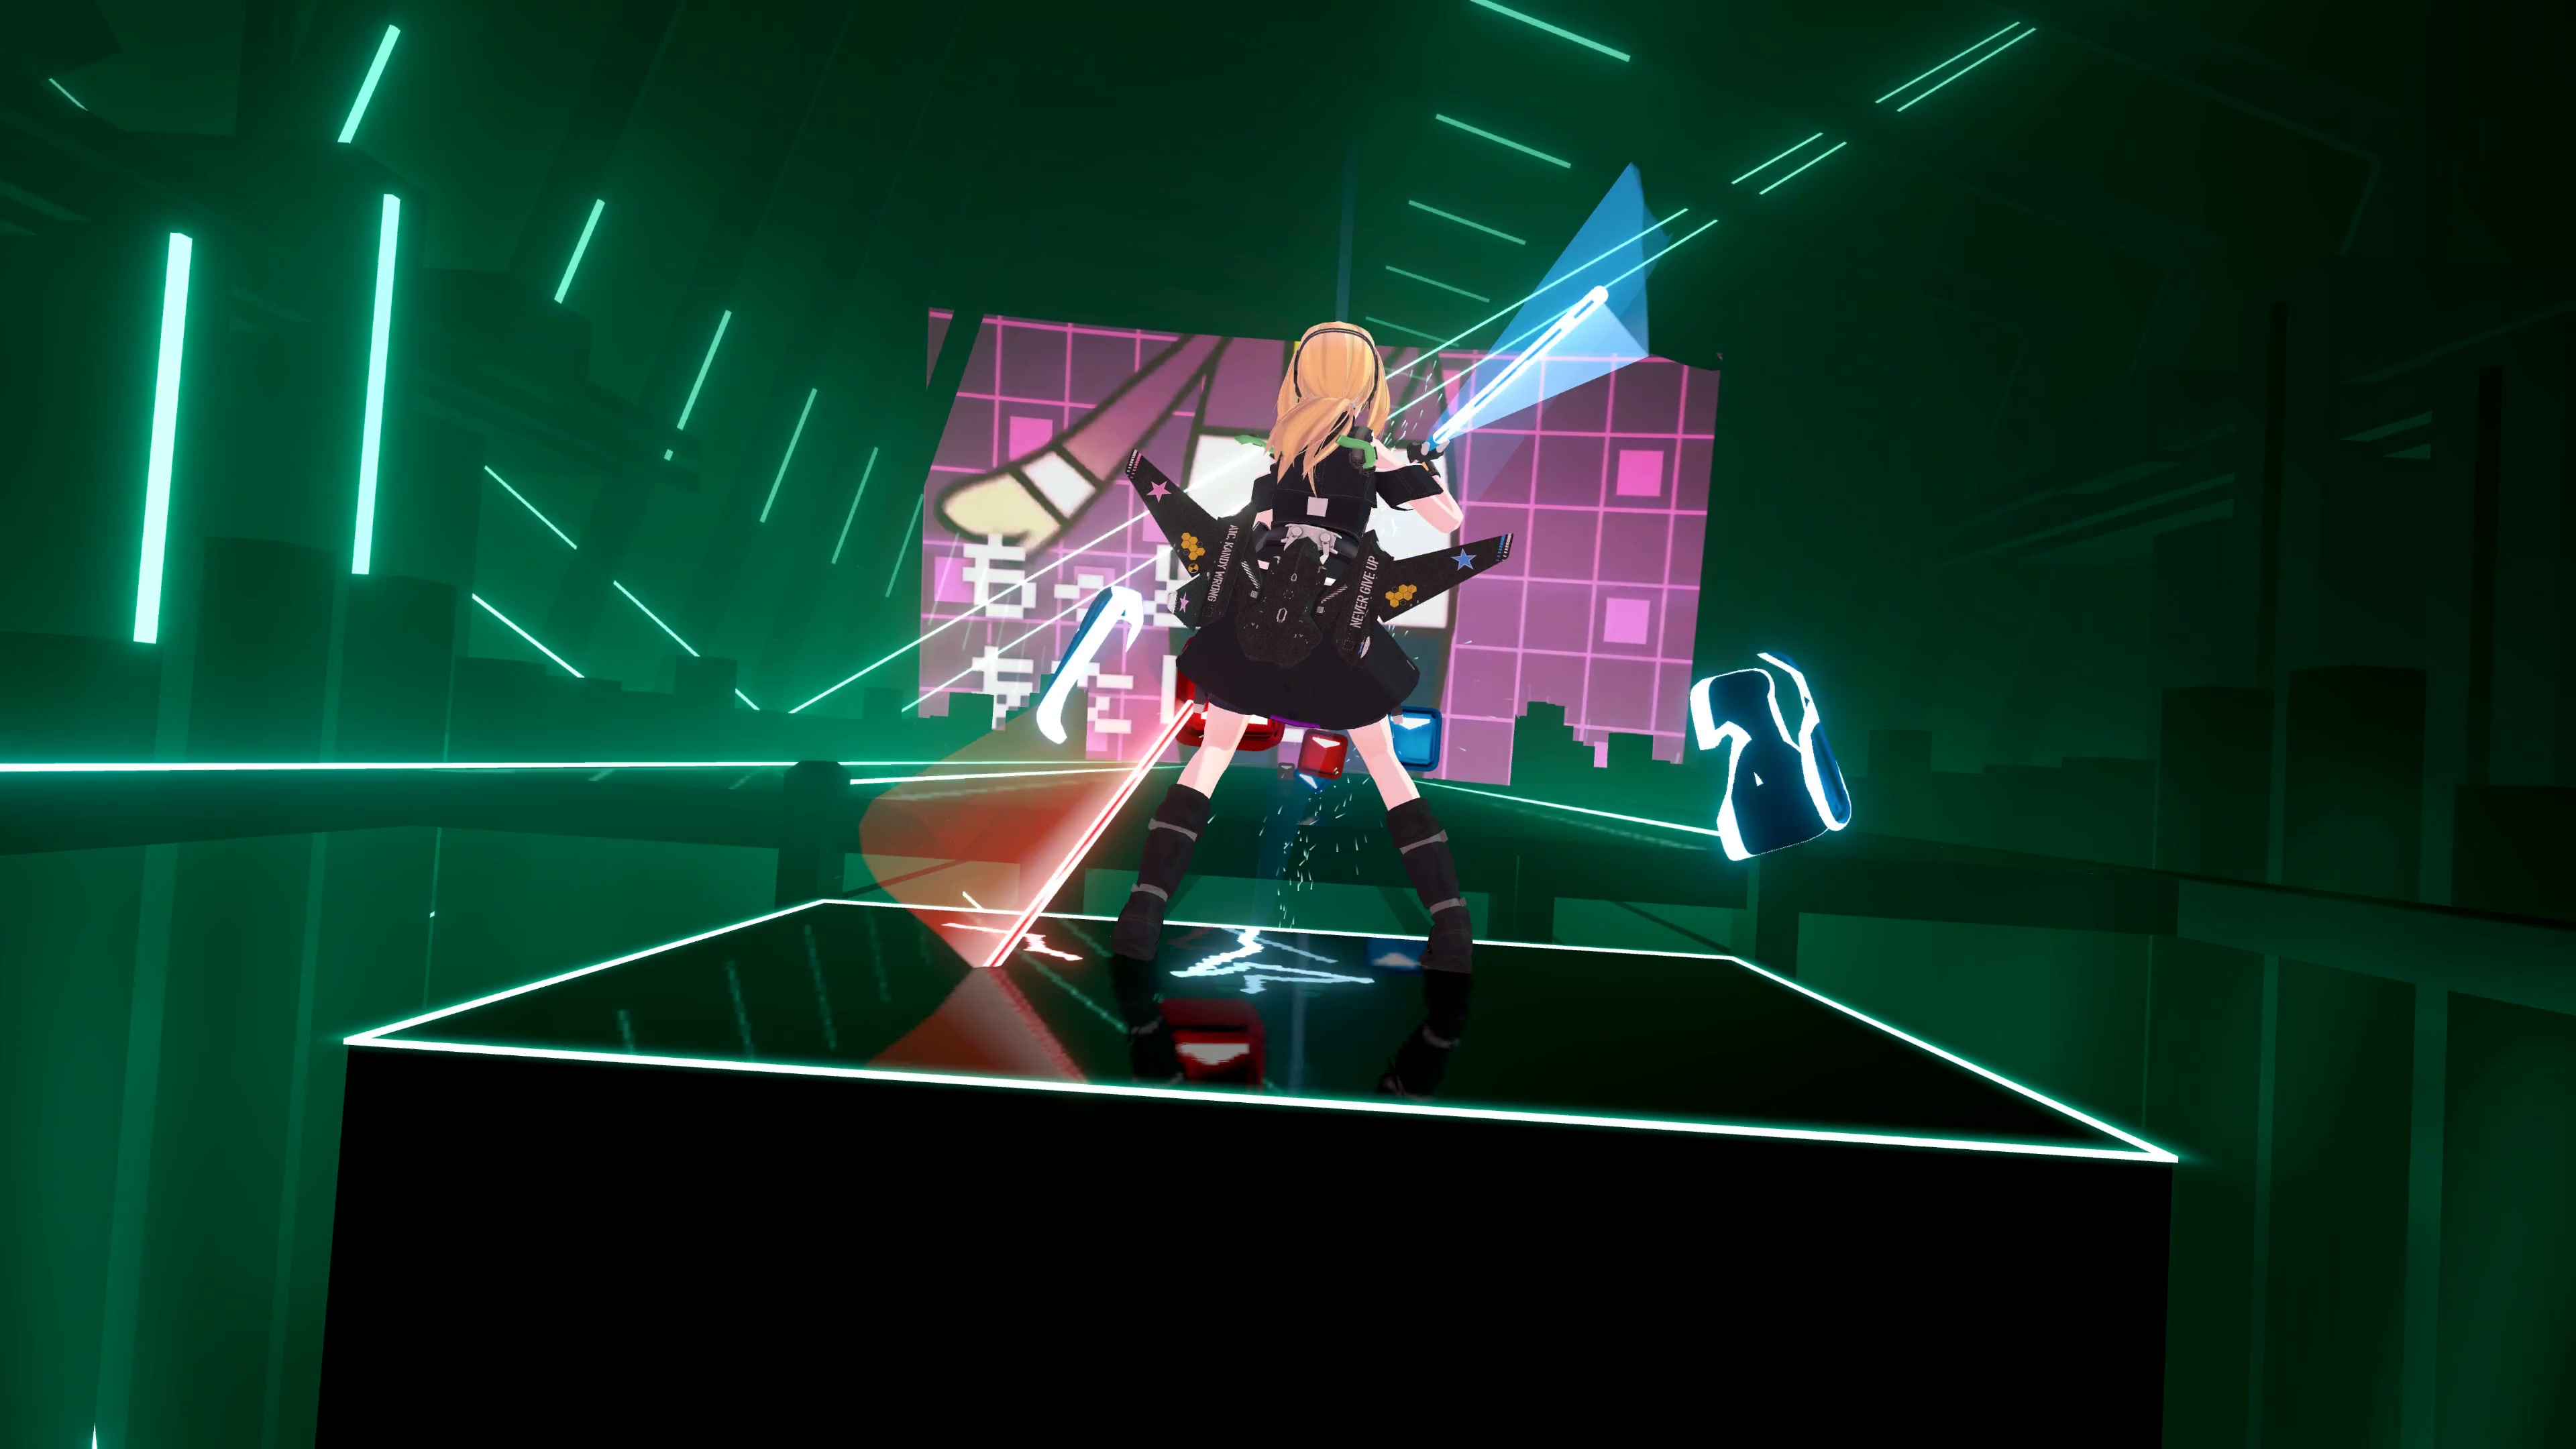
Here is what the game looks like:
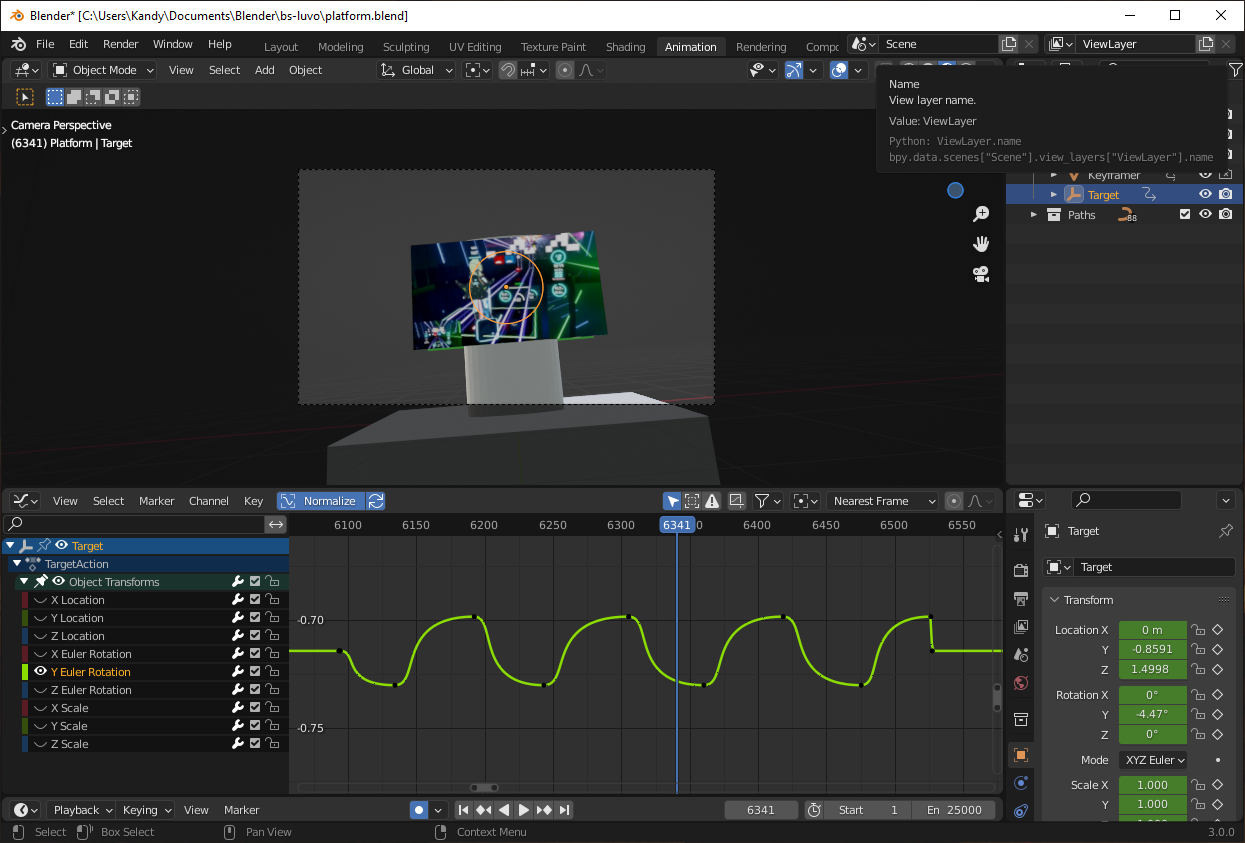
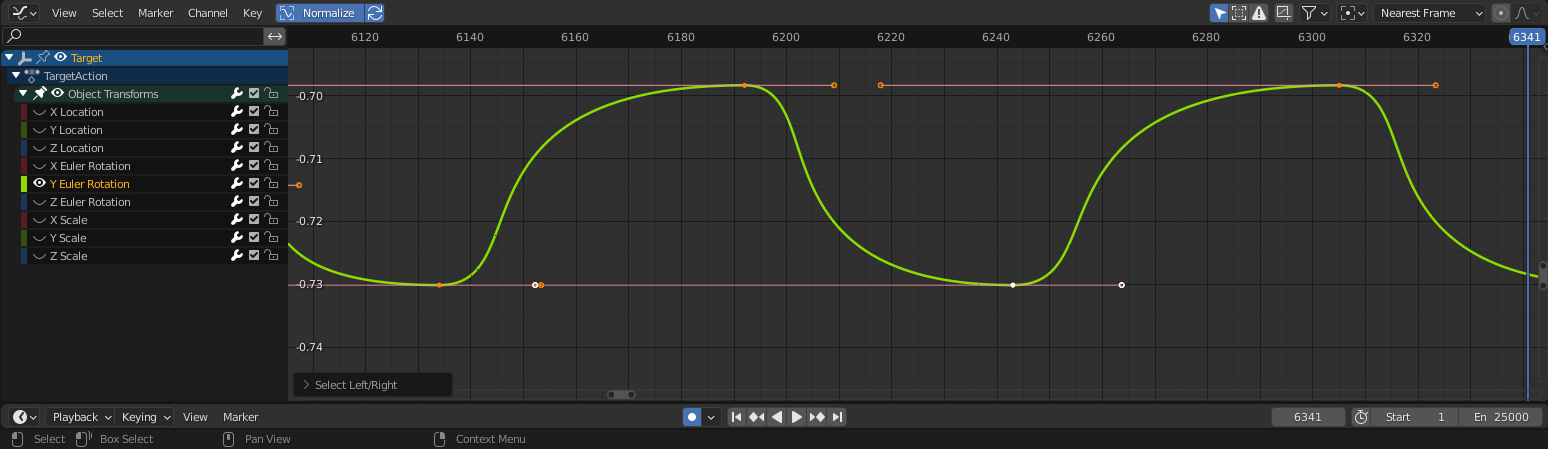
# Step 1: Configure the render output folder.
If you are using the template.blend file then the render settings are already configured. You must choose where to save the output files.
- Switch to the Layout or Animation workspace.
- In the Scene Collection tab, under Render, select
b2c2_main. - Click the Output Properties tab.
- Under Output, click the folder icon.
- Select a folder where the output images will be saved.
# Step 2: Start the render process.
- At the top of the Blender window, click Render and then select Render Animation.
- Wait for the render to complete. This will take a long time.
# Step 3: Open the rendered images in Avidemux.
- Start Avidemux
- Select File → Open...
- Open the folder that contains the rendered images
- Select the FIRST render image
- Click Open
# Step 4: Set the frame rate.
TIP
The next step depends on the version of B2C2 you have.
- If you are using the B2C2 v1.0 template, the output frame rate is
120. - If you are using the B2C2 v1.1 (or newer) template, the output frame rate is
60.
- On the left side of the Avidemux window, under Video Output, change
CopytoMpeg4 AVC (x264). - At the top of the Avidemux window, click Video → Filters
- In the list, double-click on Change FPS
- Set the Destination frame rate to whatever your B2C2 template uses.
- Click OK
- Click Close
# Step 5: (optional) Add audio.
- At the top of the Avidemux window, click Audio → Select Track
- On Track 1, check Enabled
- Click the empty drop-down on the left side, and then select ... Add Audio Track
- Select the
song.wavfile that exists inside your project - Click Open
- Click OK
# Step 6: Configure audio and output format.
- On the left side of the window, under Audio Output, change
CopytoAAC (lav) - Under Output Format, choose MP4 Muxer
TIP
If you do not have the AAC (lav) format option, then pick MP3 (lame).
# Step 7: Save the output file.
- Click File → Save
- Save the file anywhere you want
Avidemux will encode the video file. This may take several minutes.
The video can be played with VLC Player (and maybe other players too).