# Using Blender
# Installing Blender
Without Blender you will not be able to create custom camera paths or use the Blender2Camera2 export script.
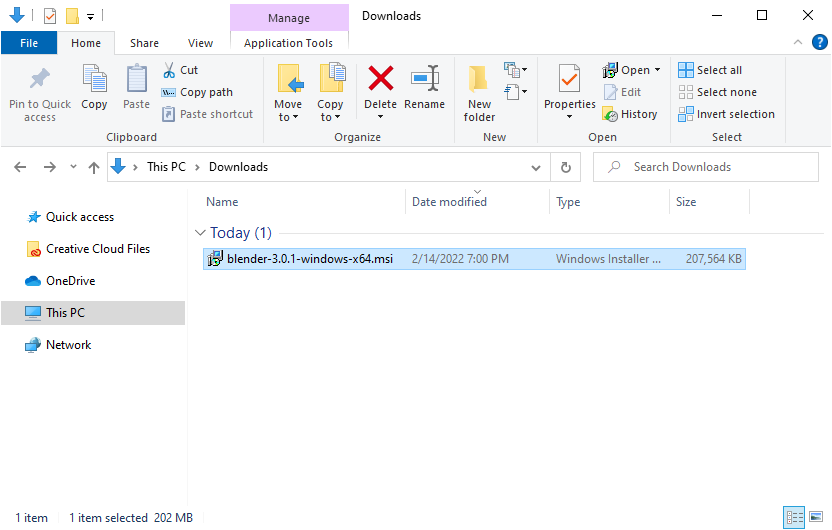
# Step 1: Get the Installer
The installer can be found at https://blender.org/download/ (opens new window)

# Step 2: Run the installer
Accept all of the installer default settings.
# First Time Setup
Open Blender from your Start menu, or from the icon on your desktop.
Configure your Language as needed. (English, Japanese, whatever)
I recommend not touching any of the other settings, especially if you have never used Blender before.
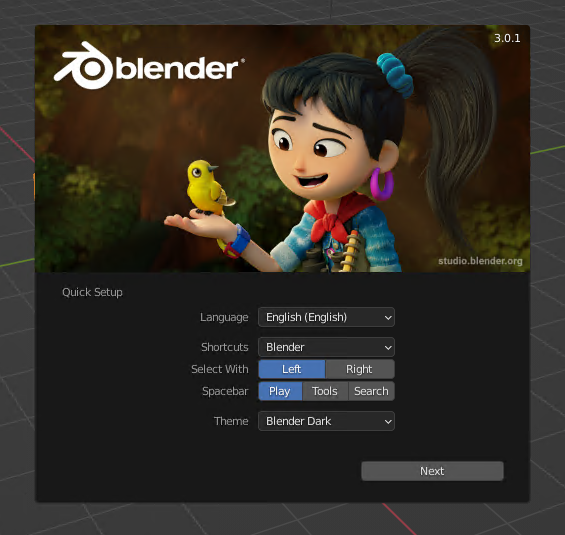
Click Next, then click anywhere on the editing grid to close this pop-up.
Welcome to Blender.
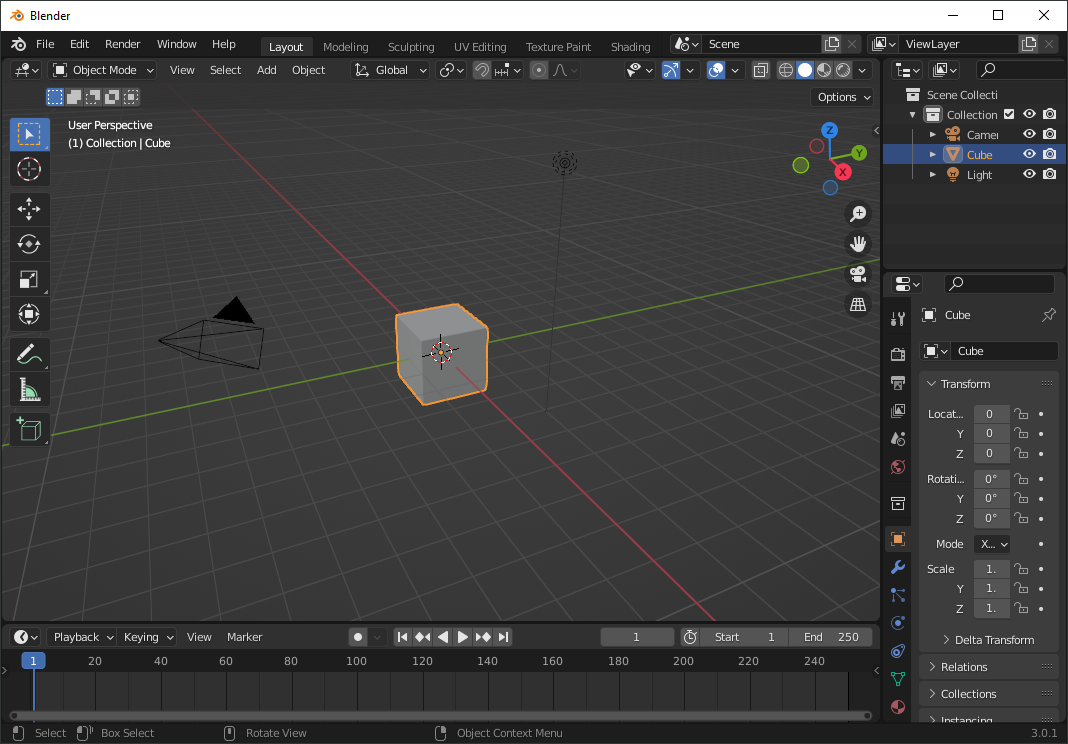
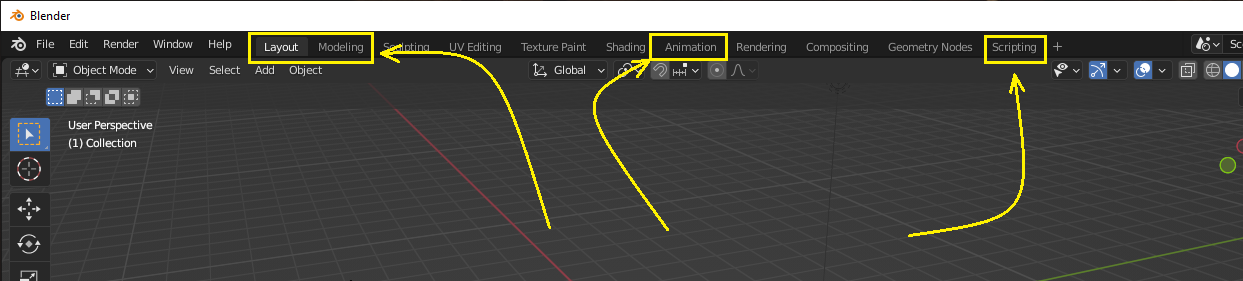
# Workspaces
TIP
If you have never used Blender before, start here.
Blender comes with many workspaces. For editing Beat Saber camera paths, you will use these workspaces the most:
- Layout
- Modeling
- Animation
For exporting the camera paths:
- Scripting
# Blender Commands
You will need to know some basic editing commands to navigate the workspaces in Blender.
I have listed my most used commands here. I suggest finding a "cheat sheet" (opens new window) of your own, because there is no way I can list every command here.
My tutorial explains which commands I use. Beyond that you will need to learn any additional shortcuts on your own.
# Change the View Axis
Click the Z / Y / X gizmo in the upper right corner to change the view axis.
# Rotate the View
Click and hold Middle Mouse button, then drag to rotate the view.
# Zoom the View
Use your mouse wheel to zoom in and out.
# Pan the View
Use Shift + Middle Mouse button to pan the view.
# Grab / Move Objects
Click an object and then press G. Move your mouse to move the object around freely.
# Rotate Objects
Click an object and then press R. Move your mouse to rotate the object around its pivot point.
# Scale Objects
Click an object and then press S. Move your mouse to scale the object.
# Grab / Move / Rotate / Scale on a specific axis
Click an object, and then press G (or R, or S). Then, press X to snap the manipulation to the X axis. For example, G + X will allow you to move the object perfectly along the X axis.
The same is true for Y and Z axis.
# Duplicate an Object
Click an object, then press Shift + D. The new object is immediately available for moving / rotating. Hit Esc to leave it exactly in the same place as the original.
# Delete an Object
Click an object, then press X. Confirm the action to delete the object.
# Create an Object
Press Shift + A, and then select the object you want from the menu.
Hold up!
For first timer users, I recommend moving on to The Tutorial. Everything beyond this point is general advice for using Blender.
# Working with Complex Paths
This section contains a quick review on how to work with complex paths.
# Creating a new path
- Press Shift + A
- Select Curve → Path
- Left-click on the new path
- Press Tab to enter edit mode.
# Using path control points
- Left-click on a point to select it. Press G to move it.
- Use Shift + left-click to select several points at once.
- Alternatively, left-click and drag to select several points at once.
# Add control points
- If you run out of control points, select the last control point on the curve and then press E.
- The new control point can be used to extend the length of the curve.
# Delete control points
- Select one or more points and press X.
- Left-click Vertices to remove the control point.
# Setting the Pivot Point
After editing a complex path you might notice that the pivot point is far away from the path. This can cause problems when rotating or scaling the path. Fixing this problem takes several actions so please pay close attention.
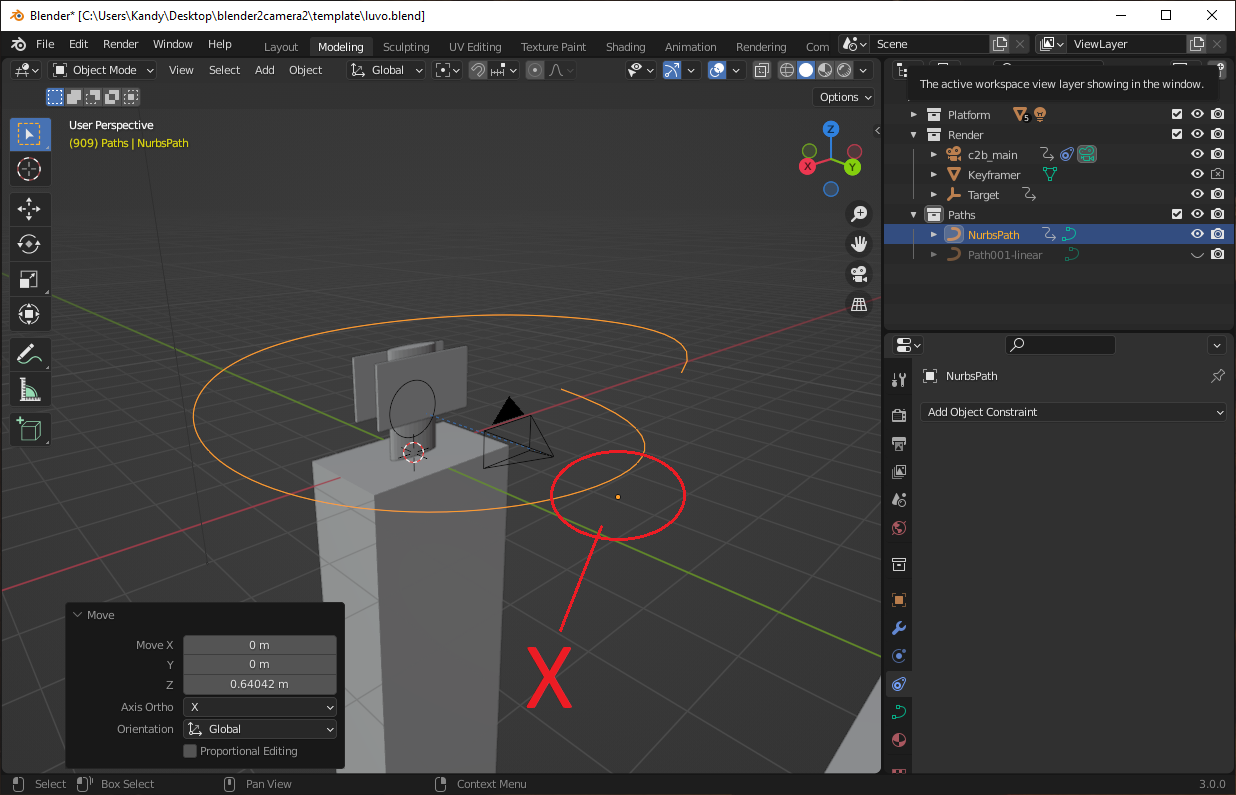
# Step 1: Set the 3D cursor to the world origin
- Open the Modeling workspace.
- Verify that the workspace is in Object Mode.
- Press Shift + S.
- Select Cursor to World Origin.
# Step 2: Set the pivot point to the 3D cursor
- Right-click on the path.
- Select Set Origin -> Origin to 3D Cursor.
# Step 3: Verify that the path can be rotated and scaled around the pivot point
Remember the basic Blender commands: G for grab / move, R for rotate, and S for scale.
# Bonus: Setting the pivot point anywhere
The pivot point does not need to be set at the world origin. You can set the 3D cursor anywhere, and then set the pivot point.
# Fixing Path Keyframes
If you are using the template, then "auto keyframing" is enabled.
When creating paths this can create unwanted effects. The paths will animate wrongly and cause the camera to look incorrect.
# Example: A Broken Path
I edited this path and accidentally created several keyframes that animate the path itself.
As you can see, when the scene is played, the path to moves, rotates, and scales on its own.
Follow these steps to fix this problem.
# Step 1: Show the path keyframes
- Open the Layout workspace.
- In the Scene Collection tab, find your broken path and left-click on it.
- Look for any keyframes in the keyframe editor.
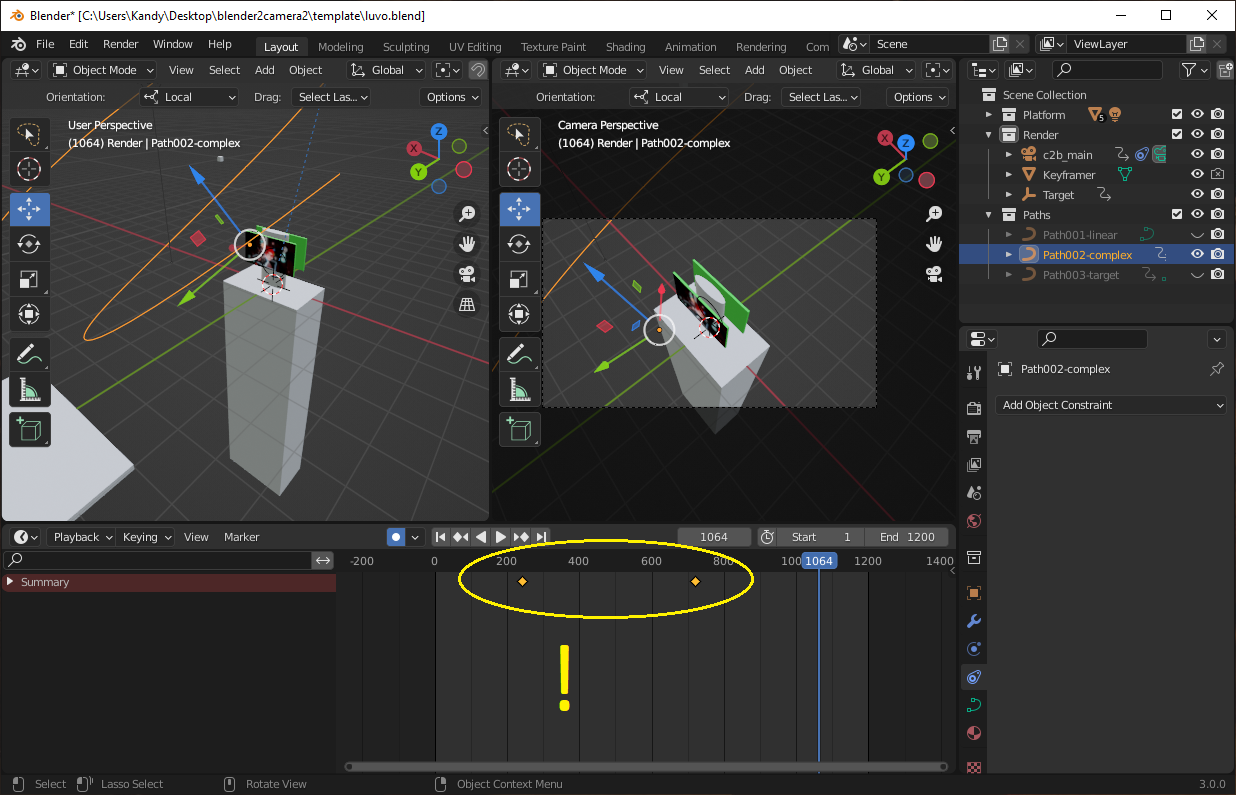
# Step 2: Move the current frame marker
Drag the marker left and right until the path is positioned correctly.
# Step 3: Delete extra keyframes
- Select the farthest keyframe.
- Press X to delete the keyframe.
# Step 4: Repeat until all keyframes have been deleted
- Delete each next-farthest keyframe until only one remains.
- Delete the final keyframe.
- When all keyframes are deleted, the path will be positioned correctly.